Top Toolbar Controls
Exploring The Top Toolbar
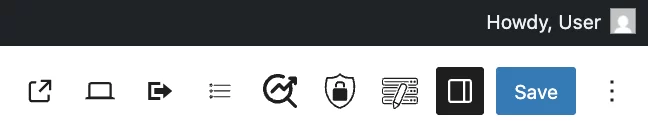
The “Top Toolbar” in the WordPress block editor interface is useful for previewing, organizing, and saving your work more efficiently. The toolbar gives you quick access to key tools, no matter where you are in your page or post editor.
View Page

The “View Page” icon appears once you click the “Save” button. Clicking this icon will allow you to view your page/post in its live or published state. The view page toolbar control is useful for quickly checking the layout of your site without leaving the editor.
View (Device Preview)

The “View” or “Device Preview” toolbar control allows you to preview your page formatted for different devices. This feature is useful for ensuring your site is readable and fits properly on every screen. Previews are generated in realtime — you don’t need to click “Save” to see Preview your page/post changes.
To use this feature, first click the View icon in your toolbar. A drop-down menu will appear with three options: “Desktop,” “Tablet,” or “Mobile.” Selecting any of these options formats your page to mimic how it will appear on each type of device. Once you have chosen your format, select “Preview in New Tab” from the drop-down menu to preview your content on your site.
Clone / Export

The “Clone / Export” toolbar control has two functions:
Clone:
First, select the Clone/Export icon, then the “Clone Now” option in your sidebar.
Next, a message will pop-up to inform you if your item has been cloned. From this message, click the underlined text “Edit the Cloned Item” to open a new editor tab and make changes.
Cloning allows you to make an exact copy of your page including all files and the entire database. This feature is helpful for reusing layouts or designs without rebuilding from scratch.
Export:
First, select the Clone/Export icon, then the “Export Now” option in your sidebar. Copy the code from the textbox that appears.
Next, click on “Tools” in the left-hand side admin menu, then “Import Single Item.”
Finally, paste your code into the empty textbox, and select “Import.”
Exporting allows you to move content from pages and blog posts to another site, or save and back up only your written content. Exporting will not transfer themes, plugins, or full media files.
Table of Contents

For help editing using this tool, we have a dedicated section on editing your Table of Contents.
SEO and Sharing

The “SEO & Sharing” toolbar control allows you to customize how your content will appear on different search engines or social media platforms. First, click on the SEO & Sharing toolbar control icon. Multiple drop-down menus will appear in your sidebar.
Sharing: Image
This feature allows you to customize the image that is shown when your page/post is shared. The default setting is “No override,” meaning either the sitewide fallback image, or the posts featured image will be shown when shared. To change this, click the drop-down arrow next to “Sharing:Image,” and select “Choose Image” and upload your picture.
This feature also allows you to select a separate image that will show exclusively when the page/post is shared on Twitter. to activate this feature, toggle the switch under “Twitter-Specific Image,” then select “Choose Image” and upload your picture.
Sharing: Customize Title
This feature allows you to customize the title that will be used when your page/post is shared. This feature is useful when sharing your site to social media platforms that have word limits for titles, or if you want a more attention-grabbing title to appear for users before clicking on your site.
To use this feature, simply click the drop-down arrow next to “Sharing: Customize Title,” and type your page title in the textbox labeled “Custom Title.”
Sharing/SEO: Customize Description
This feature allows you to customize the description that appears beneath your title in search results. A good description will summarize your content, and give readers a reason to click on your site by incorporating important keywords.
To use this feature, click the drop-down arrow next to “Sharing/SEO: Customize Description,” and enter your text in the box labeled “Meta Description.”
Search Indexing
This feature allows you to decide whether or not you want search engines to index your page. If your page is not indexed, it will not appear in search results. By default, your page will appear in search results when published. To change this, click on the drop-down arrow next to “Search Indexing,” then toggle the switch next to “Do not index page.”
The “Search Index” feature is useful when you want to share a page/post with a specific audience, but you don’t want search engines to display its contents prematurely. For instance, you could send a bulk email to your audience with a public link, allowing recipients to access and click through to your page/post while keeping it out of search results.
Canonical URL
This feature prevents issues with potential duplicate content by telling search engines the preferred version of your page. By manually entering a canonical URL, you are choosing the version of your page you want to appear first in searches. This is useful if multiple URL’s have similar content to ensure search engines rank search results correctly.
To use this feature, first click the drop-down arrow next to “Canonical URL,” then enter the URL for the preferred version of your page in the textbox below “Manually Set the Canonical URL.”
Restrict Modification

The “Restrict Modification” toolbar control allows you to prevent certain users or roles from editing a page/post. This feature is useful for ensuring your content is not accidentally changed by other editors or contributors.
To enable this feature, first click on the Restrict Modification icon in your toolbar, the toggle the switch next to “Restrict modification to admins.” This will not allow any users other than “administrators” to edit your content.
For help editing admins, we have a page dedicated to Adding / Removing Administrators.