WordPress Forms
The WordPress Form Block allows editors to create simple forms, and display them directly within a page. WordPress forms use the Bates site style, and support unique submission confirmation messages and admin/user notification emails. The form block is highly customizable, and contains a wide variety of question-type fields that can be easily rearranged and formatted to the site manager’s liking.
Table of Contents
Creating a New Form
Step 1:
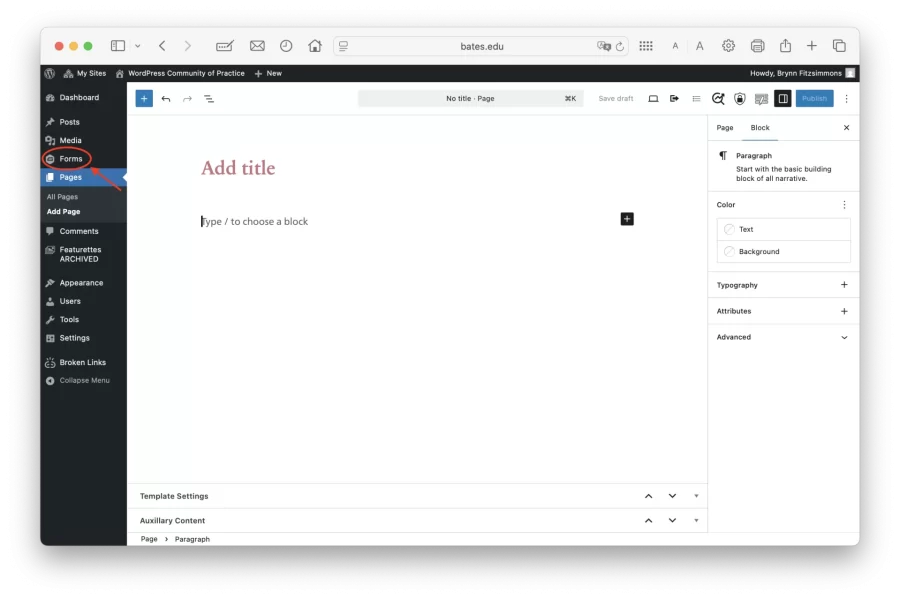
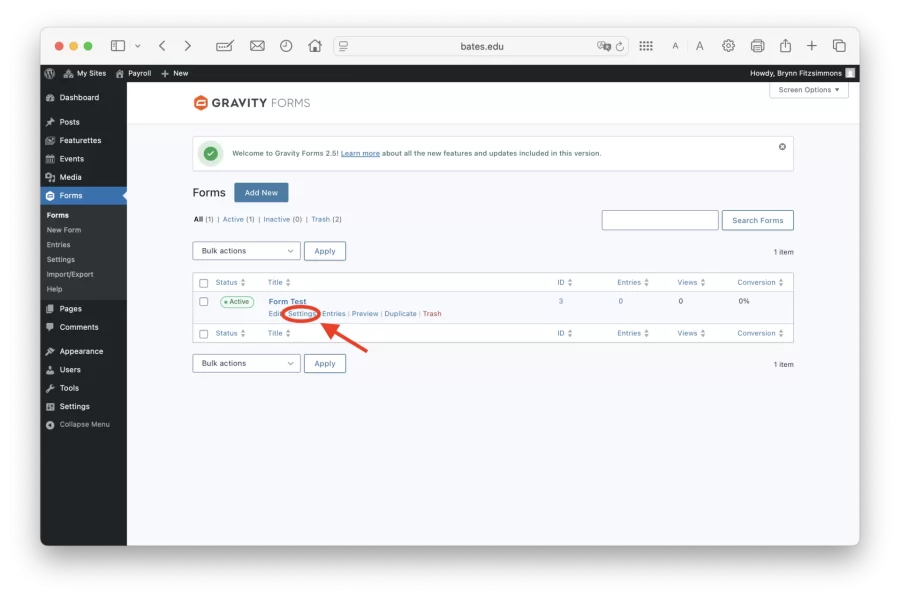
First, in the left-hand admin menu, select “Forms.” In this section, users can add a new form, as well as quickly manage and remove existing forms all in one place.
Step 2:
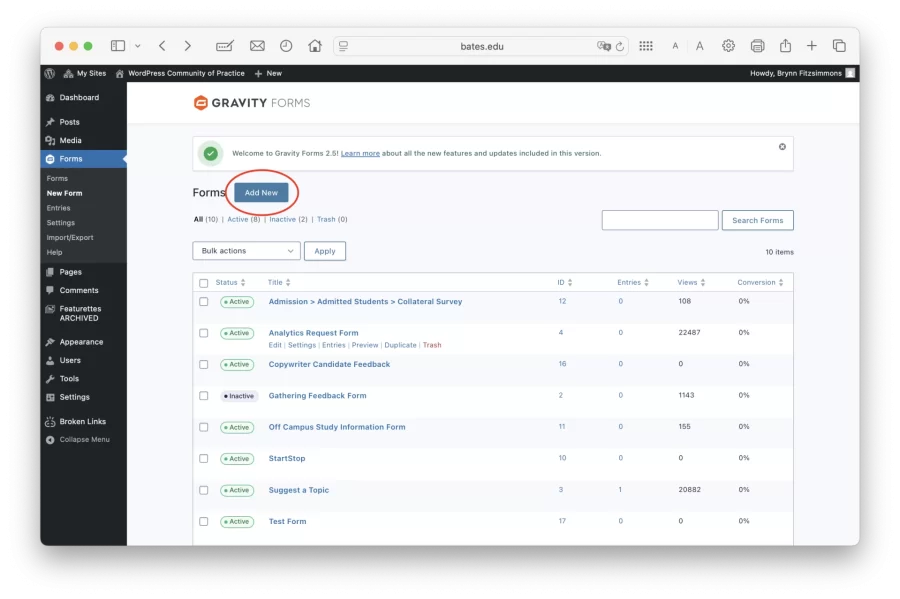
Next, click the “Add New” button.
Step 3:
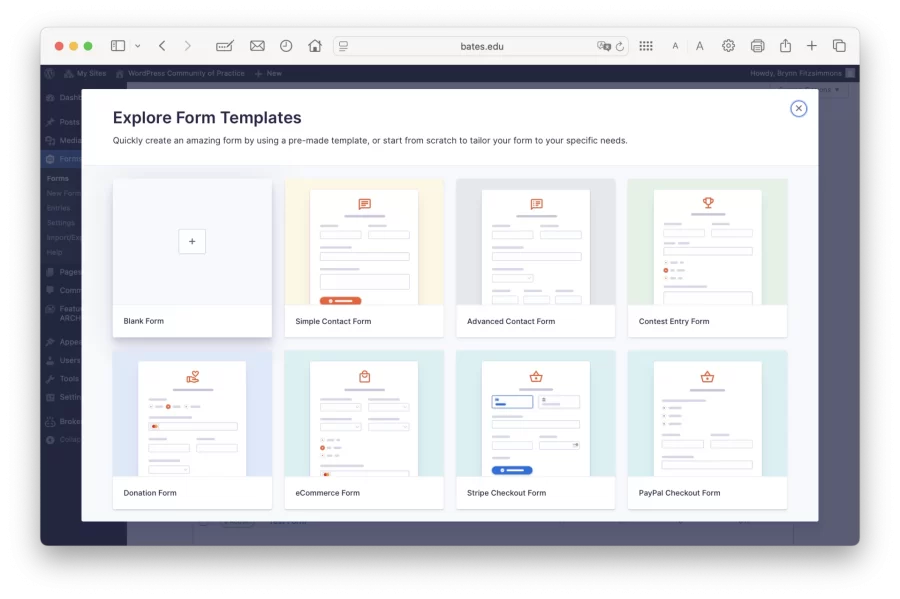
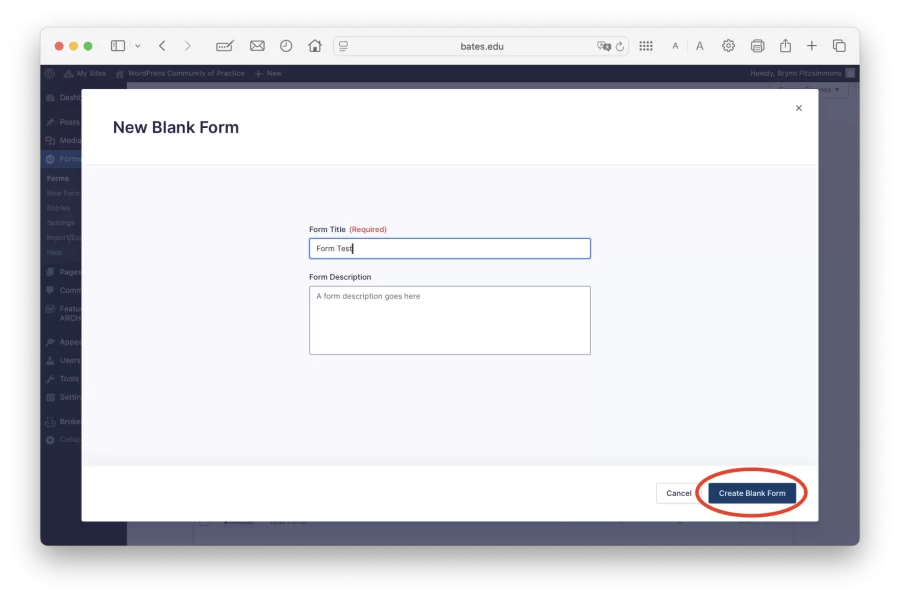
Finally, either choose “Blank Form,” or select a template. Choose a title for your form, then click “Create Form.” A new editor interface will open where users can add/remove and customize different fields in the form.
Adjusting Form Settings
Within WordPress, users can easily adjust important settings including the default confirmation sent to form participants, what information is collected, and the expiration date of entries.
Opening Settings:
First, open the “Forms” section from your left-hand admin menu. Next, hover over the form you want to edit, and select “Settings.”
General Settings:
In the general “Form Settings,” users can easily change the form title, layout, and basic restrictions.

Form Submission Confirmation Messages:
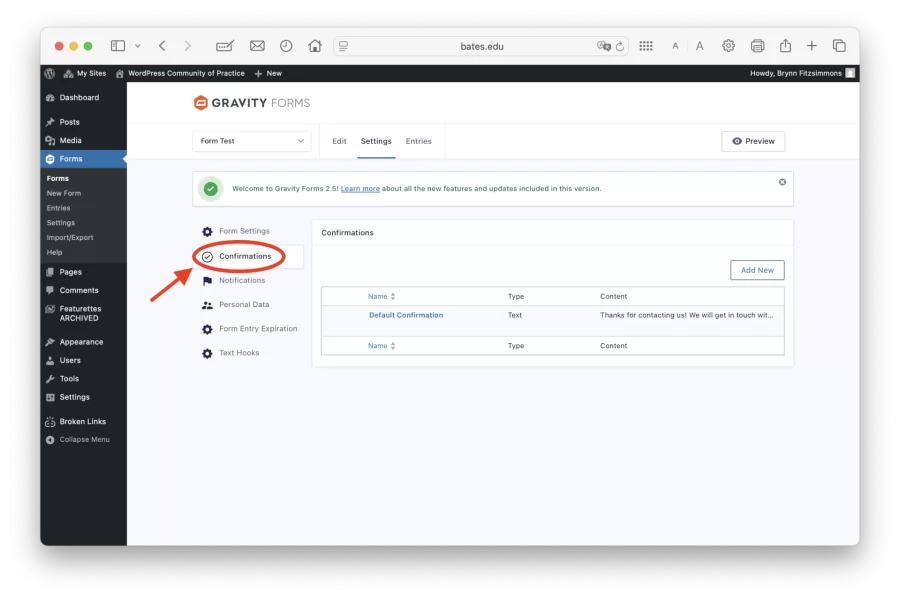
The confirmation is what form respondents will receive after their responses have been submitted. When you create a new WordPress form, the site sets a default confirmation message. Before publishing your form, be sure to check the current confirmation message, and make changes if necessary.
From the “Form Settings” page, select “Confirmations” from the sidebar on the left-hand side of the screen. To edit the confirmation message, simply click on “Default Confirmation” and edit the message directly in the textbox that appears.
Email Notifications:
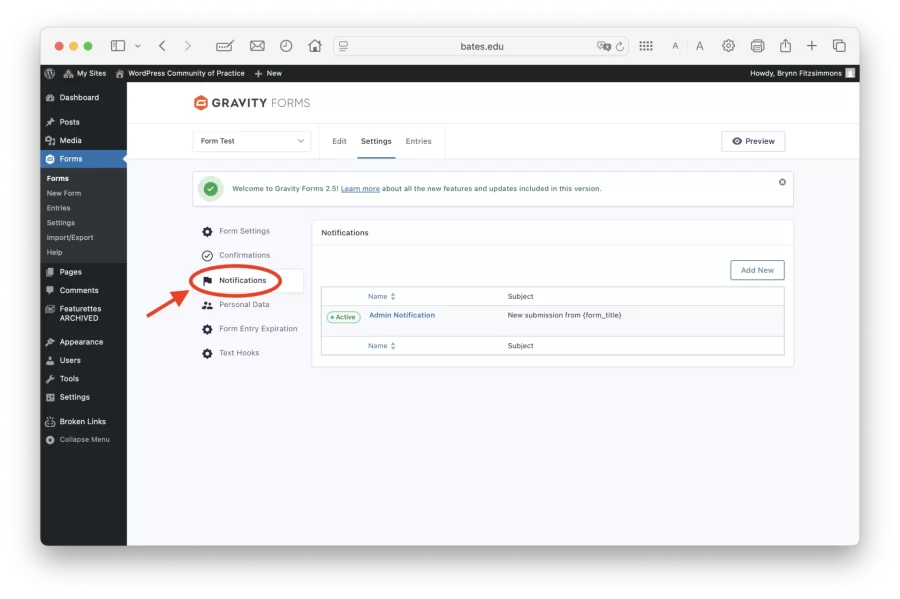
The admin notification is the message survey administrators will receive whenever a new response is submitted. The default setting is to send each response to the site admin. Before publishing your form, be sure to add the appropriate admins and adjust the notification email if necessary.
From the “Form Settings” page, select “Notifications” from the sidebar on the left-hand side of the screen, then click “Admin Notification.”
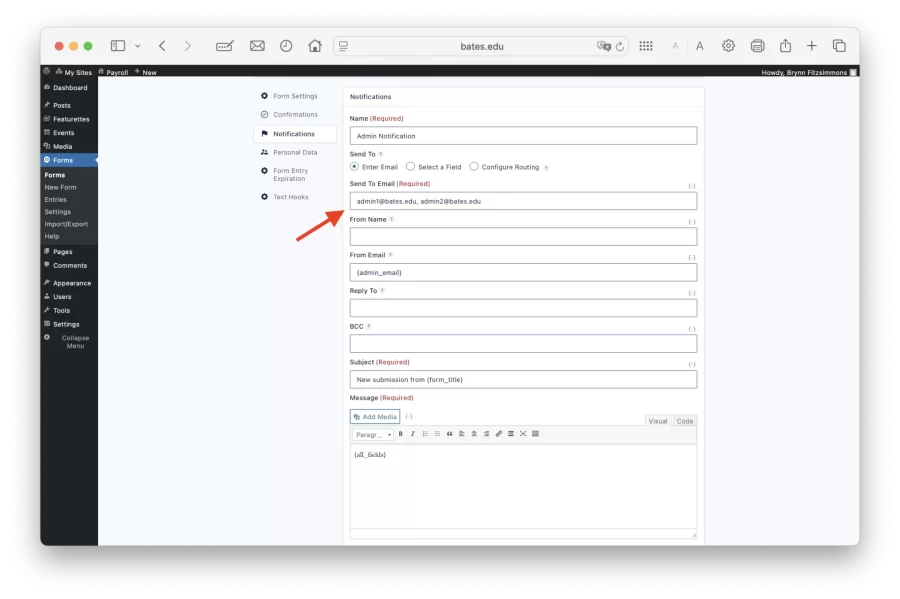
From here, change notification recipients by selecting the textbox under “Send to Email.” Next, enter the emails of each intended recipient separated by a comma as demonstrated below. Be intentional about choosing who is receiving notification emails, especially for surveys with high response volumes.
WordPress forms allow for conditional email notification routing whereby emails are sent to specific email addresses based on a form submission criteria of your choice.
Site managers can also set up email notifications for site visitors, on the condition that the form has an email field in it.
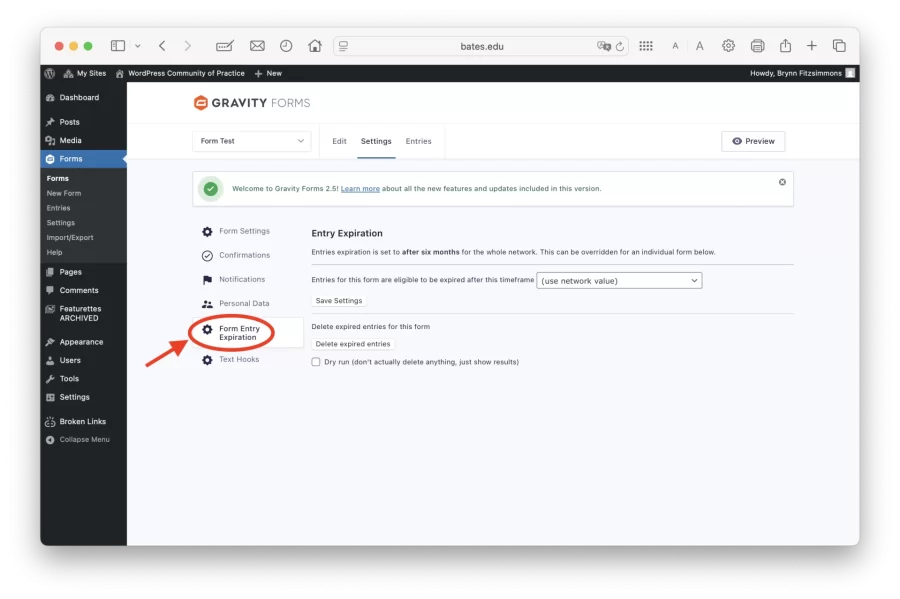
Form Entry Expiration:
The “Form Entry Expiration” section allows you to adjust how long survey responses are stored on WordPress.
From the “Form Settings” page, select “Form Entry Expiration” from the sidebar on the left-hand side of the screen. Forms are set to expire after six months by default. To change this, click the dropdown menu under “Entry Expiration,” and select your desired retainment duration.
Choosing between WordPress and Google Forms
Both WordPress and Google Forms have their individual benefits. Generally, WordPress forms are ideal for smaller-scale forms embedded directly into your site, and sending personalized submission confirmations and admin notifications, while Google Forms are better for more structured, high-volume data collection that may require collaboration and storage outside of WordPress.
If you need help choosing which form to use, refer to the table below.
WordPress V.S. Google Form Features
| Feature | WordPress Forms | Google Forms |
|---|---|---|
| Access | Located directly in your site editor | External tool that can be embedded within a page or linked to |
| Style | Matches Bates site style automatically | Matches Google style |
| Collaboration | Can be edited/accessed by assigned WordPress Editors | Can be shared with any Google users of your choice |
| Data Retention | Responses deleted after six months by default, can be changed in site settings | Responses automatically populated into a Google Sheet to be stored long-term |
| Data Safety | Stored in WordPress and dependent on site settings | Stored securely in Google with built-in protections |
| Data Handling | Dependent on manual CSV exports | Real-time data syncing between form entries and spreadsheet |
| Email Notifications | Highly customizable confirmations and admin/visitor email notifications | Limited notification customization |
| Best Use | Collecting low-risk information directly on your website | Collecting data that requires further analysis and easy collaboration |
Qualtrics
For large or complex data collection, Bates recommends using Qualtrics.
Qualtrics is a web-based survey platform designed for creating multi-page surveys, collecting anonymous responses, and efficiently managing and analyzing data.
Qualtrics allows users to easily track survey participation, send survey reminders, and store information in shared survey libraries. Qualtrics should not be used for long-term storage, or the transmission of sensitive or confidential data.
Qualtrics survey authors determine how data is handled and who has access to it. Survey respondents are then informed prior to participating what data is being collected, and how their information will be shared.
For help creating an account and navigating Qualtrics, refer to Institutional Research, Analysis & Planning Using Qualtrics Guide.